DIY Paris Push Pin travel Map

When I was planning my trip for Paris, I looked up just about every map available. We would be navigating solely by map (no smart phones for us- gasp!) and so I wanted to be sure I was well-versed in the area before we even got there. Thank heavens for the great laminated fold-up map I found. It got us everywhere we wanted to go. But in the process of looking, an amazing vintage map of Paris came up, with all the landmarks of the great city pictured on it. Oh, how I drooled!

I though how neat it would be to actually have an old map like that, but the important thing for the trip was locating the most current street map I could find. Who knew that wandering into a bookshop in Montmartre, Paris, I would find that EXACT vintage Paris map??!! God is pretty cool that way, huh? Right there was a beautiful copy of the vintage map that I had longed for, and for just 8 euro. I rolled it up and carried it like a baby the rest of the day...
When I got home I used to as decor for a time, just enjoying the memories it evoked. I thought it looked quite nice just suspended in an old frame. But what I had really wanted all along was to make into something that I could push pins into to show all the wonderful places that Andrea and I had visited.
 |
| All the necessary supplies |
I made a stop at Hobby Lobby and found a piece of foam core board that was just a bit bigger than my map for about $4. Then I looked everywhere in the store- stationary, office supplies, paper crafting, etc- for pretty push pins and found none. At Wal-mart, I got a can of spray adhesive. And there were ugly, but perfectly usable, packs of push pins. My dear friend Raquel read the post where I mentioned my map, here, and told me that they had lovely pins at Target. Thank you, darling, but I had already gone and made things way harder than necessary for myself ;)! The pin colors were awful with the soft vintage tones of my map, but I just happened to have a partial can of silver spray paint. (You would not believe the amount and variety of colors of spray cans I have lurking about.)
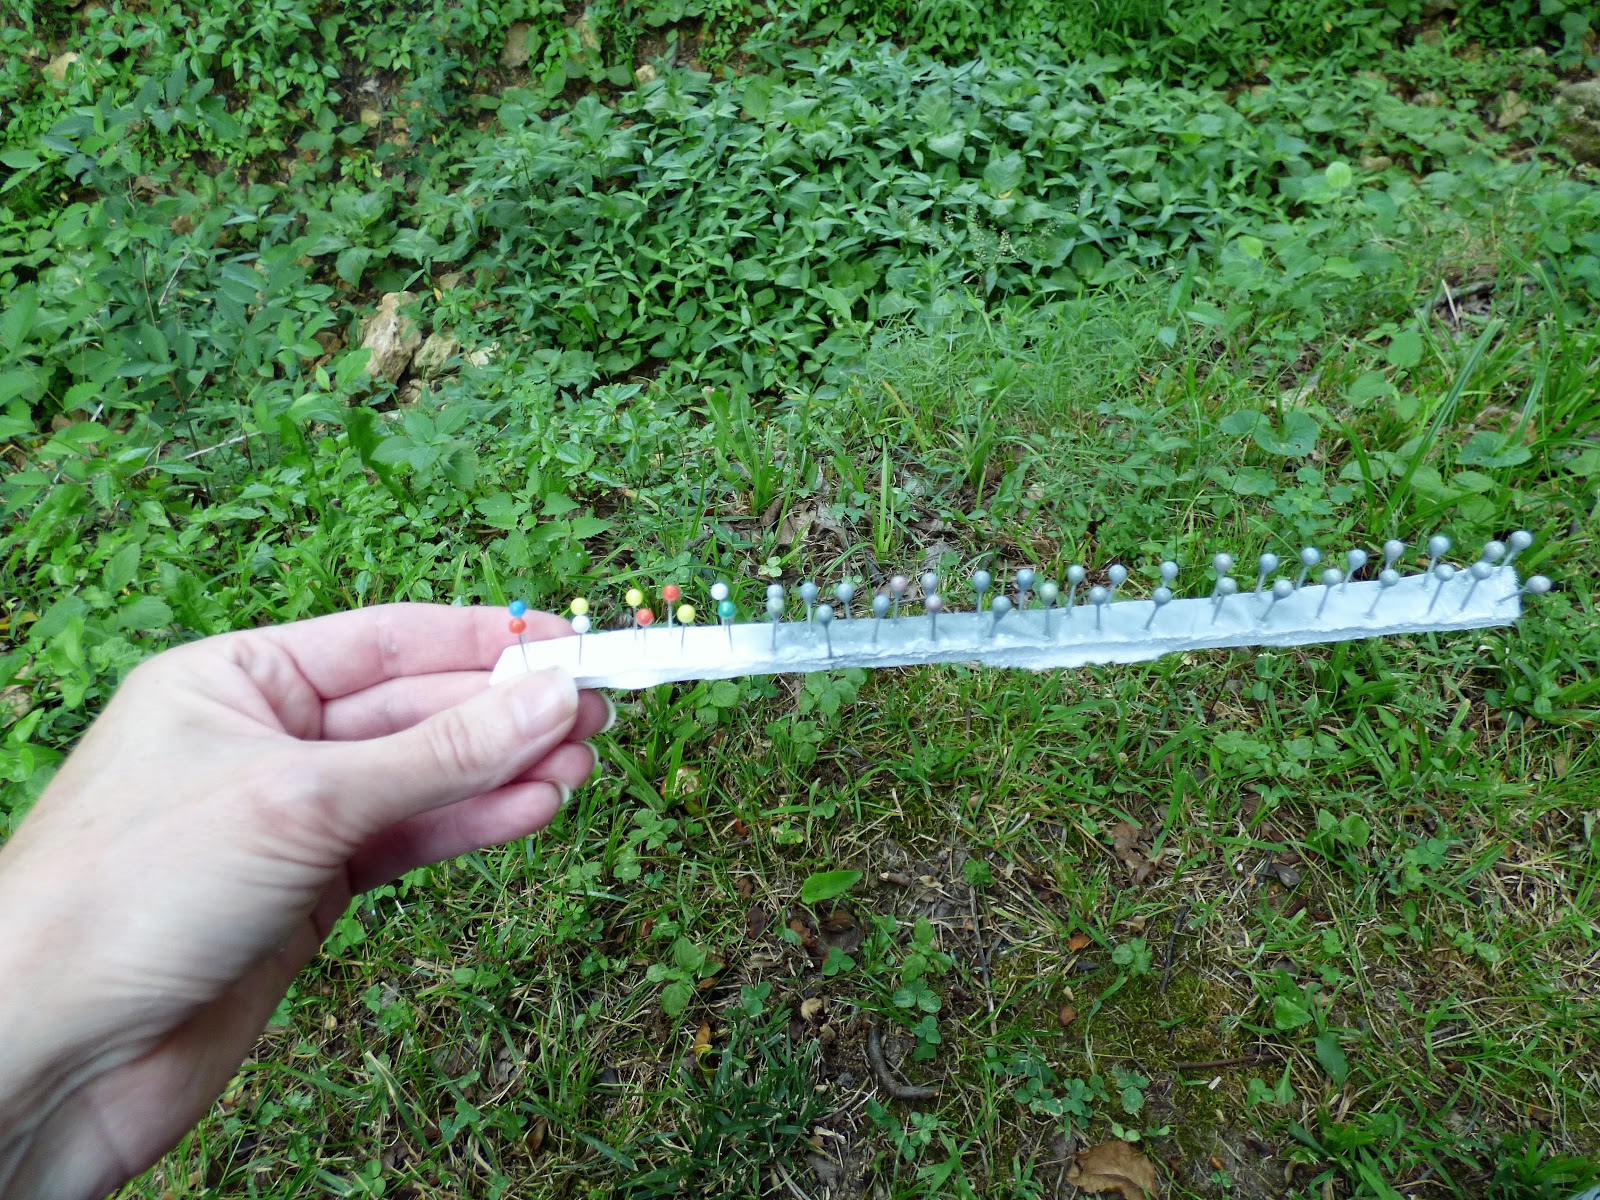 |
| From primary colors to silver |
But after spraying them, I still didn't like them. And they blended in with the map so as to be almost invisible. At least the paint had completely masked the primary colors, so I just hand painted a quick coat of gold paint over the silver. Much better and they even looked aged! This all took just a few minutes- remember my impatience!- due to using a hair dryer on high.
 |
| and from silver to gold! |
Then to apply my map to the board. To make sure that I didn't stick down one side of the map, then continue on and realize I had gone sideways and run off the edge of the foam board (voice of experience here), I used Washi tape to secure it the way I wanted it to be. I used Washi tape because I had it, and it pulls off with absolutely no tearing of paper or leaving of stickiness.
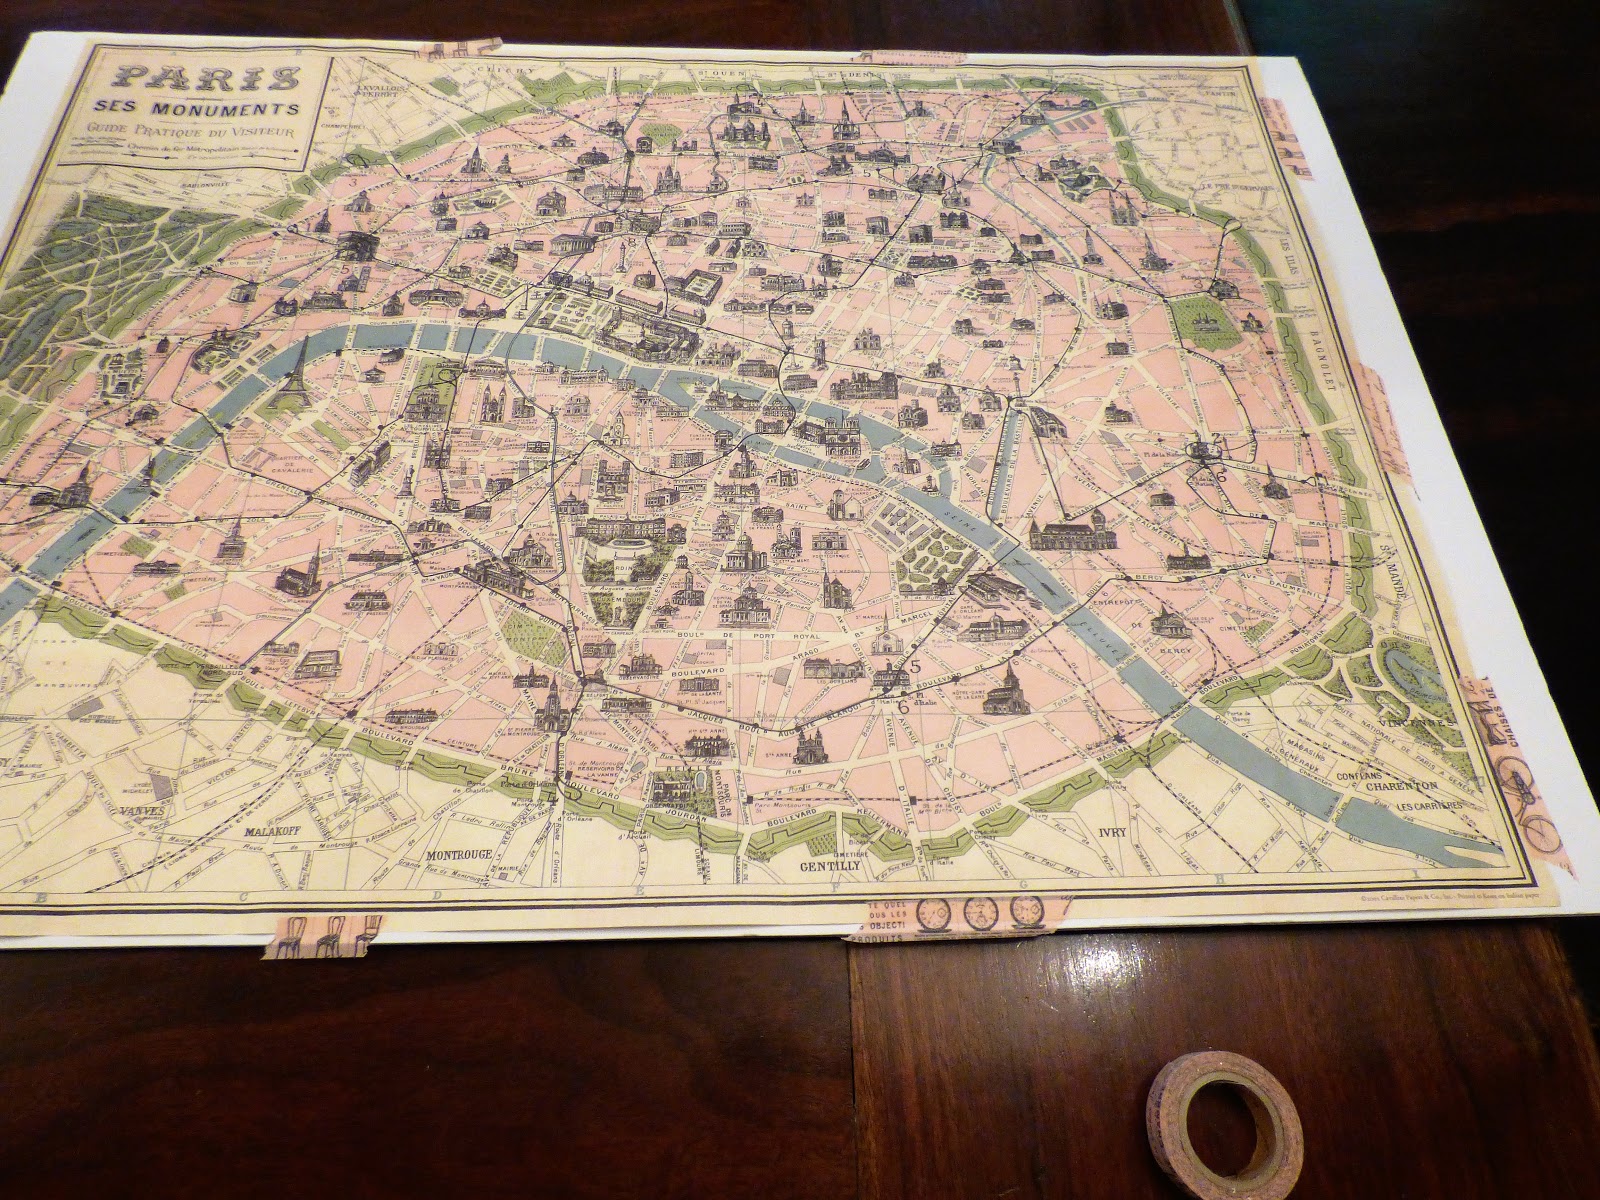 |
| taped down in the position I want it |
Once I had it situated to my liking, I removed the tape at one end, sprayed with glue and smoothed it down. When that was set, I could take off all the other tape because the map would no longer shift. Then I sprayed the rest of the map and smoothed out carefully.
After a few minutes it was dry enough to take out on the porch and trim the edges so there was an even margin around the map. I used a razor knife and a yard stick. You have to press firmly with the knife to cut all the way through. Foam board is almost impossible to cut without a bit of raggedy-ness to the edge, but it wasn't enough to bother me. If it had been, I would have hot glued fabric trim around the edges.
 |
| a bit of a trimming |
I had a map ready to hang, and I wanted to do it NOW! The whole shebang is so light that all I did was hot glue a "toothed" hanger, like the kind you can get in packs at Walmart, to the back. I had to take down a picture to put up the map (have you seen how packed my walls are?!). I loved it, and it had taken about 15 minutes in all to make!
 |
| wow! my workmanship is outstanding (cough/gag) |
So then I had the super fun part- sitting on the bed with my push pin map, and the current map that I took to Paris, and sticking little gold pins at each place that we had journeyed to. It was the kind of happily satisfying thing that makes you swing a foot and hum little songs to yourself.
 |
| sticking in pins and grinning like a fool |
And then, Ta-Dah!, it was complete and ready to grace my bedroom wall. It makes me so happy. From a distance it is just a beautiful map of a place dear to my heart. But I walk right past it every time I enter the bathroom or closet. Closeup there are all the little gold dots, reminders of a trip that I never thought possible. Yet there are all the tiny, tangible reminders...I was there!
 |
| just one of the sections of Paris we explored |
Would you like to make a Push Pin Travel Map? You can see how very easy and cheap it is to do so. Would yours be a world map? One of your own country? Or perhaps just your home state? There are so many amazing places to see, right near where you live, that you may have never ventured to. I hope you travel, Dear Reader, even if it is just to a new-to-you spot in your own hometown!


Comments
Post a Comment
Hey, sugar, I'd love to hear from you! If, for some odd reason, this won't let you comment, please send me a message at mssamwearsdresses@gmail.com. Thanks a ton!